
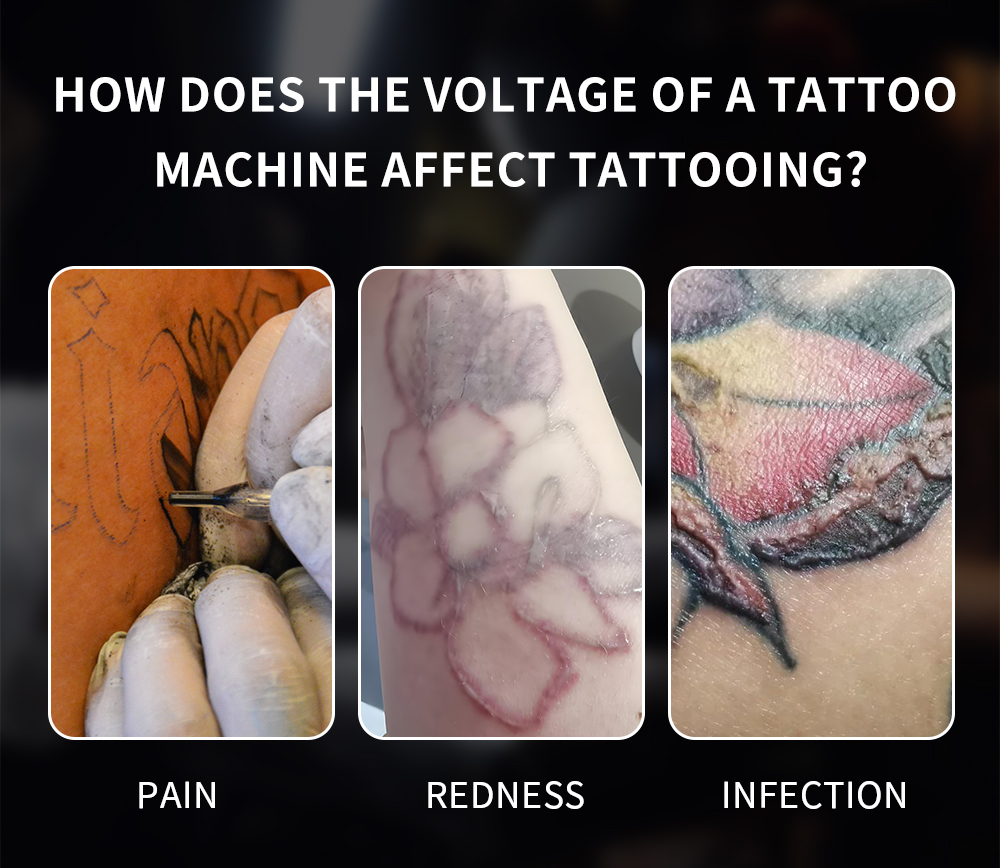
The tattoo machine is the artist’s primary tool, and its voltage setting is a critical factor that directly impacts the final outcome of the artwork. Getting the voltage right is essential for creating clean lines, smooth shades, and vibrant colors.
1. What is the Standard Voltage for a Tattoo Machine?
Typically, tattoo machines operate within a voltage range of 6 to 10 volts. However, this is not a one-size-fits-all number. The ideal setting varies depending on the machine’s model, brand, motor type, and the specific requirements of the tattoo artist.
2. How Does Voltage Affect the Tattooing Process?
Voltage has a direct and significant impact on the quality of a tattoo. Here’s how:
-
Depth and Power: Generally, a higher voltage increases the machine’s speed and power. This results in greater needle penetration depth and force, leading to more pronounced and deeply set tattoos.
-
Lines and Shading: Higher voltages are often better for creating bold, solid lines quickly. In contrast, lower voltages are ideal for softer work, such as smooth shading and subtle color gradients, as it allows for a more controlled application of ink.
-
Skin Healing: Excessive voltage can cause significant skin trauma, leading to unnecessary pain, swelling, and an increased risk of infection. Conversely, a voltage that’s too low may result in poorly saturated tattoos that “fall out” or don’t hold well in the skin during the healing process.
3. What Factors Should Be Considered When Choosing Voltage?
Selecting the right voltage is a balancing act that depends on several key factors:
-
Tattoo Area: Different parts of the body have varying skin thickness, elasticity, and texture. Bony areas with thin skin (like the ribs or ankles) may require a lower voltage than fleshy areas (like the thigh or bicep).
-
Needle Configuration: The type and size of the needle grouping matter.
-
Fine needles (like small round liners) require lower voltage to prevent tearing the skin.
-
Larger needle groupings (like big magnums or bold liners) need higher voltage to ensure they have enough power to penetrate the skin effectively and evenly.
-
-
Machine Type:
-
Pen-style machines, known for their precision, often excel at lower voltages, making them ideal for detailed and delicate work. They require a specific voltage range to balance speed and accuracy without causing undue trauma.
-
Coil and other rotary machines have different power characteristics and might require different voltage settings for similar tasks.
-
-
Type of Work: The task at hand is a primary factor. As you’ll see in the chart below, lining, shading, and color packing all have different ideal voltage ranges. Start with a recommended range and fine-tune from there.
-
Artist’s Experience and Hand Speed: An artist’s individual technique is crucial. A seasoned artist who works with a faster hand speed might use a higher voltage to match their pace, while a beginner may need to start slower with a lower voltage to maintain control.
4. Recommended Voltage for Different Tattooing Techniques
Different techniques require different machine speeds and power. Here are some general voltage guidelines:
-
Lining: 7.5 – 9V
-
Shading (Black & Grey): 6 – 8V
-
Color Packing: 7 – 9V
-
Lining: Lining requires precision and consistency. A higher voltage (typically 7.5 – 9V) is used to ensure the needle penetrates and retracts cleanly and quickly, creating crisp, solid lines in a single pass.
-
Shading: Shading demands a softer approach to avoid over-saturating the skin. A lower machine speed creates smoother blends. Therefore, a lower voltage (typically 6 – 8V) is used, allowing for a gradual buildup of ink to produce smooth gradients and subtle transitions.
-
Color Packing: This technique involves filling in areas with solid color. A moderate to high voltage (typically 7 – 9V) is chosen to allow the artist to efficiently saturate the area with ink while maintaining control and minimizing skin damage.
Disclaimer: Please note that these are general guidelines. The ideal voltage can vary based on your specific machine, needle setup, power supply, and personal technique.
5. How to Adjust Your Tattoo Machine Voltage
Fine-tuning your voltage is a skill developed over time. Here’s a step-by-step approach:
-
Know Your Machine: Start by understanding the recommended operating voltage range for your specific tattoo machine. Read the manual and familiarize yourself with its capabilities.
-
Observe the Skin: Assess the client’s skin type (e.g., thick, thin, sensitive, stretchy) and the characteristics of the area you are about to tattoo.
-
Initial Setup: Based on the type of work (lining, shading) and your needle choice, set an initial voltage. With experience, you’ll learn to distinguish voltage by the sound of your machine. However, if you’re new to tattooing, it’s wise to start at a moderate voltage, like 8V, until you become comfortable with your hand speed.
-
Gradual Adjustment (The Hand Speed Balance): A key indicator is the quality of your lines. If the tattoo depth seems correct but the lines appear faint or “skippy,” it might mean your hand speed is too fast for the current voltage. You can either slow down your hand speed or increase the voltage to match your pace.
-
Stay in Tune: Pay close attention to how the skin is reacting. Ensure your voltage is harmonized with your hand speed and needle depth to achieve the best results without causing unnecessary trauma.
In Conclusion
The voltage of a tattoo machine is a cornerstone of quality tattooing. The optimal setting is not a fixed number but a dynamic variable that depends on the tattoo area, needle configuration, machine type, tattooing technique, and the artist’s own skill and hand speed. By understanding these factors and learning to make flexible adjustments, an artist can ensure they achieve the best possible results for every piece.